[Title] [text TOC] [image TOC] [Site Search]
 [Donation]
[Donation]
[Donation]
| Arrowhead |
|---|
| Materials | Tools |
|---|---|
| Plaster of Paris | Cup Spoon Molds Rings Knife Paint and brushes |
See the Plaster Chapter for more instructions, hints, tips, and ideas.
This is a great first whittling project because the shape of arrowheads varies greatly. For younger boys, plaster is easier to work than wood.
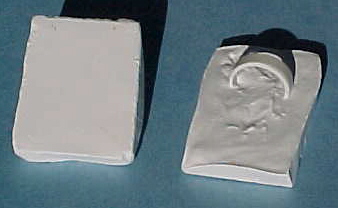
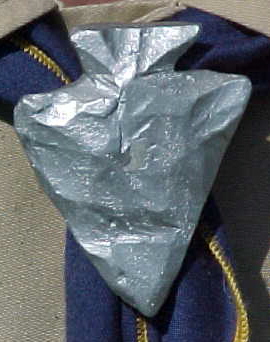
First, make a small box about 2"x3"x3/4" thick. Use a rigid plastic that is easily cut and folded. Overhead projector plastic works well. Use tape to seal the corners so they don't leak. See the instructions for mixing plaster. Mix the amount of plaster that you will need and pour it into the mold. Fill molds about half full of plaster and put a PVC ring about a third of the way down from one of the 2" ends. Remove the arrowhead blank from the plastic mold after the plaster has hardened. Let it dry at least a day before carving. See the section on Arrowheads in the Wood Carving section for more details on carving. Then you can paint it with acrylic paints. Be sure to paint the back so the plaster doesn't come off on your neckerchief. Make the arrowhead so that the point faces down when worn.
To make this project go faster consider mixing instant powdered tempra paint in the plaster. This eliminates the need to paint it.
Try to do this project with a knife, but if circumstances make it unsafe (not enough adult supervision, too many people around, too young of a group) this project can be done with plastic serrated knives (only good for about one arrowhead before they wear out) or even a flat piece of rock or concrete.