[Title] [text TOC] [image TOC] [Site Search]
 [Donation]
[Donation]
[Donation]
| Decorative Whistles |
|---|
| Materials | Tools |
|---|---|
|
1/2" thick Basswood 10" x 1/4" dowel |
Saw Pencil Drill press 1/4" brad point drill bit Vise or clamp Carving Knife Gouge Sandpaper Paint and Brush Wood Glue Large paper clip |
See the Wood Carving section for more instructions, hints and tips.
You might want to start by making a Basic Whistle.
The basic whistle was designed to be simple so that most everyone could be successful. But whistles can be made with a wide variety of characteristics and can be hidden in a project. Below are some general rules and guidelines to whistle making.
Whistles can be made with a hole diameter anywhere from about 1/4" to 1/2". Too large and it takes too much air to blow. The bigger diameter the hole the louder the sound. 1/4" and 5/16" work well.
The length of the hole determines the tone; shorter is higher in pitch and longer is lower. The length of the drill bit is usually what limits you here. Anything shorter than about 1 1/2" will be more difficult to get to work.
You can disguise a whistle in almost any shape. Let your imagination run wild. Try to hide the wedge by putting it in the back or incorporating it into the project.
Here are some simple ideas to get you started. Have fun!
 Hot Dog |
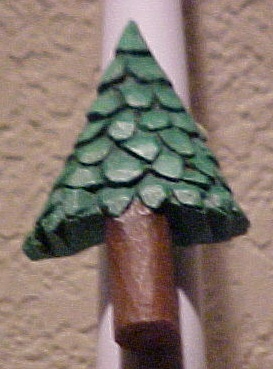 Tree |
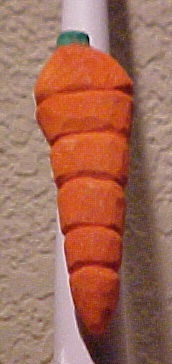 Carrot |
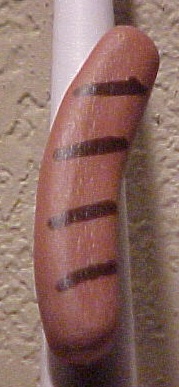
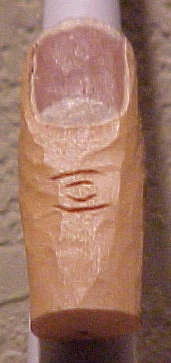 Thumb |
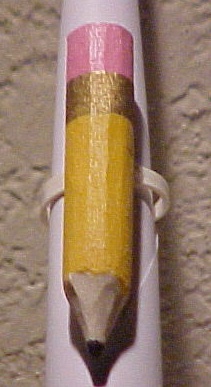 Pencil |
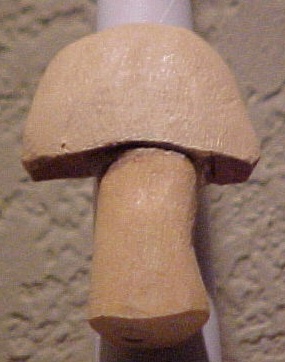 Mushroom |
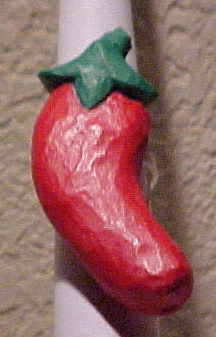 Hot Pepper |
 Snowman |
Some other ideas are: banana, ice cream cone, pumpkin, walking stick, bird, arrowhead, alligator head, Fleur-de-lis, boot, penguin, and worm.
Read all instructions first before starting.
Pick a shape
Lay it out on a piece of wood at least 1/2" thick and at least 2 1/2" long. The spot where you are going to drill the hole should be flat and perpendicular to the direction of the hole. If it's at an angle, the drill bit will tend to slide off.
Cut it out using a coping or scroll saw
Drill the hole
Use a drill press and vise (or at least a clamp) to keep the wood straight so the hole doesn't break through a side of the wood. Lower the drill on the outside of the project to check it's alignment. Mark the location of the center of the hole on the top of the project. When you are confident of the alignment, drill the hole. Use a sharp bit and go slowly to make a clean hole without fuzzies. A lip and spur drill bit also known as a brad point or doweling bit works best.
Get the whistle working first before you carve the project
If you can't get the whistle to work, there's no sense spending the time carving the rest.
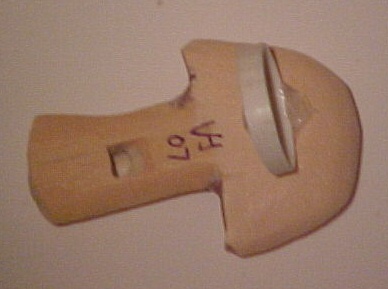
Locate the position of the hole
You need to know where the hole is in order to carve the wedge, but you also don't want to accidentally carve into the hole while shaping your project. Insert a long dowel into the hole. Place a straight edge along one side of the dowel. Draw a line on the back of the project where the opening will be located. Now repeat for the other side of the dowel. Using the dowel, measure the depth of the hole and mark it on the back of the project.
Form the opening wedge
The most important aspect of the whistle is the wedge that you remove. It needs to be at about a 30 to 45 degree angle and extend about halfway into the hole. The back side should be perpendicular to the hole. The wedge only needs to be as wide as the hole. This makes it less conspicious.
Mark the location of the wedge. The perpendicular side should be about 1/2" from the hole opening to allow enough room so your lips don't cover the opening.

Push the knife straight in to make the perpendicular cut. Make stop cuts on the lines where the sides of the hole should be.
Insert the dowel into the hole to reinforce the wood as you cut the wedge out. Now use the knife or a skew to remove the wedge. See the drawing above. If the wood tends to collapse, you can use super glue to strengthen it or sand it with sandpaper glued to a Popsicle stick cut to the proper size.
Make the dowel insert
The insert is shown in black in the drawing above. Cut about 1" to 2" of the dowel off and sand or cut off 1/4 to 1/3 the diameter of the dowel the entire length. Sand the ends flat. You'll only need about 1/2" of the dowel, but being longer makes it easier to handle.
Place the dowel into the hole. The end of the dowel should be just about even with the perpendicular cut of the wedge. Test it out.
TROUBLE SHOOTING
You may have some difficulties getting the whistle to work. I know I have. It is very frustrating because you can't see what's happening. Below are some ideas and hints to try to help you resolve the problem.
You want a clear sound from the whistle. When it starts to work, you will hear a tone. As you blow harder, the sound may get airy. When you get it just right, as you blow harder, the tone will get louder. If you have a particularly difficult time, once you get the dowel insert positioned properly, mark its location with a couple of marks.
While testing, be careful not to touch the part of the dowel extending out of the whistle hole. It helps if the dowel fits snuggly, otherwise it will move every time you blow air into the whistle.
Make small changes one at a time and test.
Carve your project
After you have the whistle working to your satisfaction, you are ready to carve your project. Be careful not to cut into the hole. Leave the wedge in tact.
Glue the dowel insert in place with wood glue. Carefully give it a final test to make sure it still works.
After the glue has dried, trim the dowel flush with the back of the project.
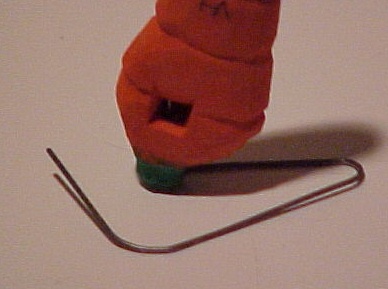
Paint your project
Paint the end with the hole first. You can bend a large paper clip into a stand to hold the whistle while you paint the top and let it dry. Bend the long end of the paper clip out and the short end up.
Finally, seal it with a coat of Deft spray.