
[Title] [text TOC] [image TOC] [Site Search]
 [Donation]
[Donation]
[Donation]
| Mobius Triangle |
|---|
| Materials | Tools |
|---|---|
|
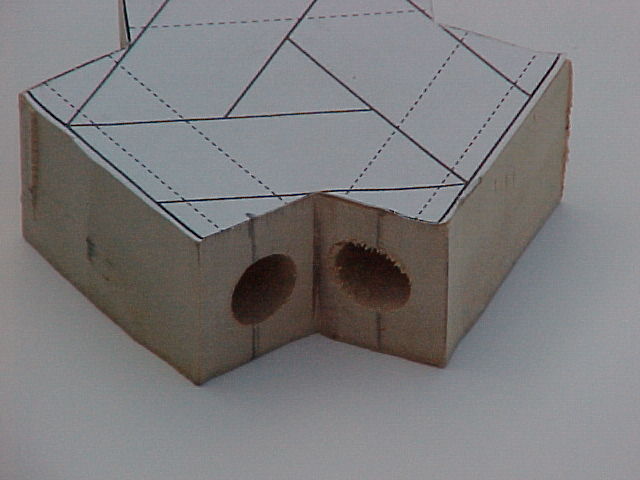
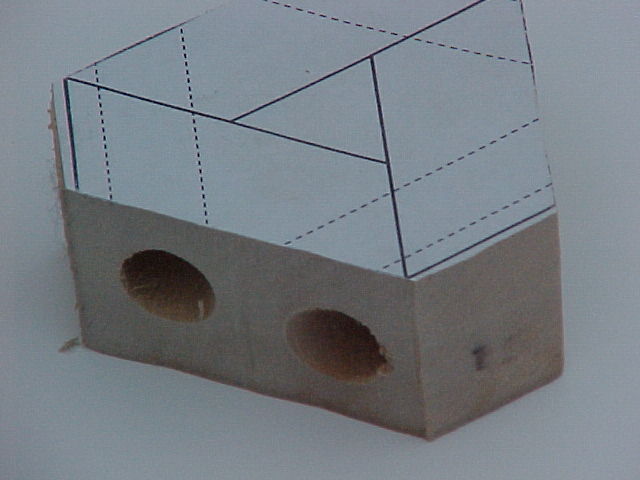
3” x 3 1/2” x 1” block of basswood PVC ring |
Scissors Stick glue Saw Drill press and vise ˝” drill bit Pencil Wood carving knife Sandpaper Clear finish E-6000™ |
See the Wood Carving section for more instructions, hints and tips.
You may also be interested in learning more about Mobius strips and topology or carving a Figure 8 Mobius Strip.
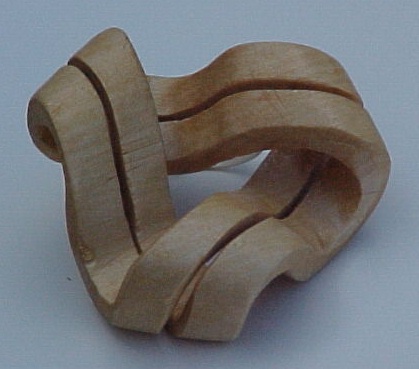
You may sometimes hear a Mobius strip referred to as an endless ribbon.
It makes a curious optical illusion that will perplex people. It looks like the two halves should come apart. People will want to inspect it up close to see what the trick is. The answer is that because it has only one surface, it will not come apart.
It can be carved in basswood, but use a prettier wood like butternut or cherry for a more beautiful piece of art.
It might help to first make a go-by from a piece of leather about 8” long and 1/2” wide. Thick craft foam works also, anything that has a thickness and is flexible. Paper doesn’t work too well because it’s not thick enough.
Form the shape as in the photo. Note that all loops start at the top of the loop and end up at the bottom of the loop. Use a dab of E-6000™ glue to hold the ends together. You can use a spring paper clip to hold the ends together while the glue dries. If you are in a hurry, use tape or hot glue.
Note that when using leather for the go-by, at the point where the two ends meet the flesh side will be on one end and the hair side on the other. This shows that it has only one side. You could also use a pencil to draw a line down the middle of the strip. It will go all the way around and meet up with the start of the line without lifting the pencil from the material. This also proves that it has only one side.
Print out the diagram below. Copy or scale it to the desired size. Glue the diagram to the wood using stick glue.
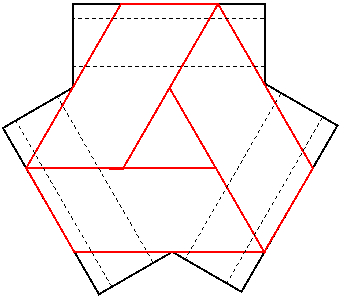
Alternatively, you could lay it out yourself. The overall shape is an equilateral triangle. All of the sides are 60-degree angles.
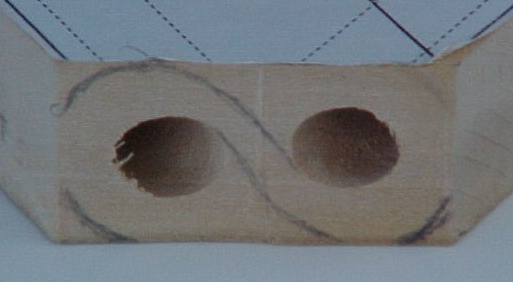
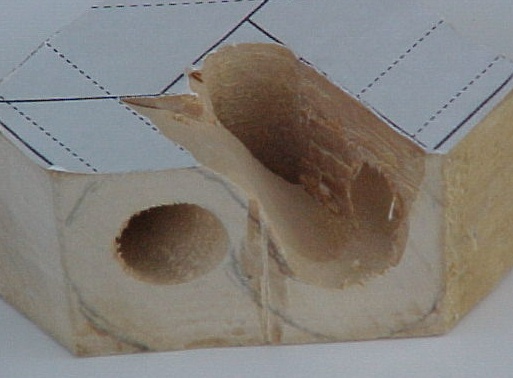
If you cut it out on the red lines, it is very difficult to drill the holes because the drill entry is on an angle and the drill bit tends to slide off. It can be done if you use a paddle blade. It is much easier to cut as shown in the black lines, drill on the flat surface, and then remove the excess wings.
At this point, you can split the Mobius strip in half. This gives it a dramatic look. However, this will make it more delicate.
Using a pencil, draw a line around the whole shape in the middle of the ribbon. This will be difficult on the inside of the loops, but do the best you can.
Now start making a cut straight in along this line. You will have to go over it multiple times to get all the way through. You may also have to take out some thin slivers. Be careful to make your cut straight in or when you slice through the ribbon you will be off center.
Continue separating the two sides all the way around following your center line. Try to end your cut on one of the flat ribbon rather than on a loop. It just makes it easier to connect the ends of the cut.
Be careful when making the final cuts because when you separate the two halves the whole thing will be more flexible and fragile.
Depending on how wide you want to separate the two sides, a narrow opening or a wide one, you can use your knife to widen the gap or sandpaper.
If you use sandpaper you may have to start with a single piece of coarse. When possible, fold the sandpaper in half so you will be smoothing both sides at the same time. Next use thin sand blocks and move up to thicker ones until you have achieved the desired separation.
Apply a clear finish.
To make a neckerchief slide, use E-6000™ to glue a PVC ring to the back of one of the sides. Be careful not to glue the two sides of the ribbon together as this would detract from the effect of being cut in half.