

[Title]
[text TOC]
[image TOC]
[Site Search]
 [Donation]
 |
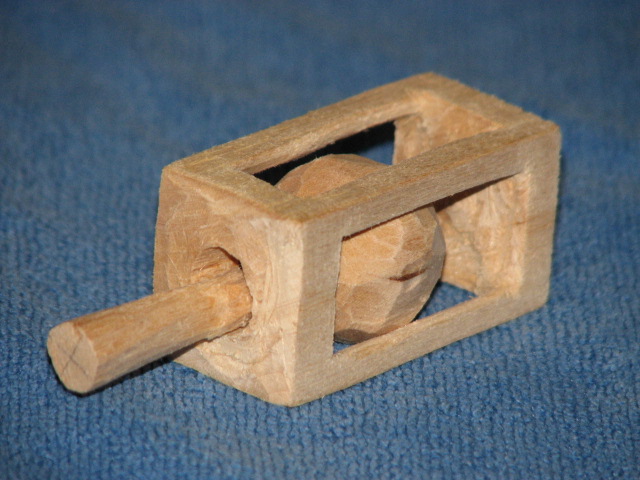
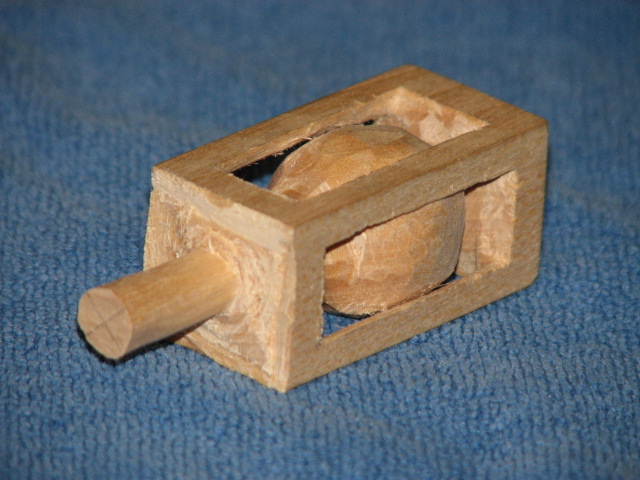
Lollipop |
 |
| Materials |
Tools |
1"x1"x3" basswood
|
Pointed Knife
Sandpaper
Pencil
Ruler |
See the Wood Carving section for more instructions, hints and tips.
This is a little bit harder than a ball in a box. If you haven't carved a ball in a box before (or it's been a while) you might want to review the ball in a box instructions.
You need a pointed knife to get into the tight places of this carving. A blade with a rounded point won't work.
Start with a sharp knife; it will make the cross grain cuts a lot easier.
- HINT: You can remove the wood around the stick below the box with a saw to make things go faster.
- HINT: When you are laying out the design, be careful not to draw outside the frame as this wood won't be cut away. You will have to sand the lines off when you are finishing it.
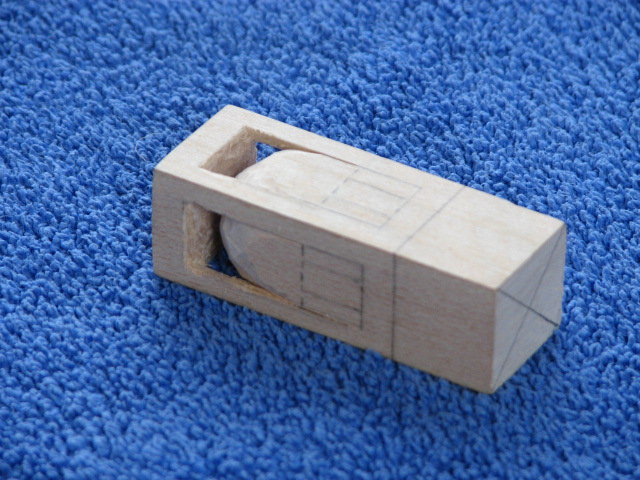
- Draw the frame of the box on the top portion of the block. The vertical sides should be about 3/16" wide and 2" long. The top and bottom of the box are 1/4" thick. The inside of the box itself will be 1 1/2" tall and 5/8" wide.
- Draw a line 1" below the top frame (that is, 1 1/4" from the top of the block). This will mark the bottom of the lollipop (ball).
- Mark the diagonals on the bottom of the block.

- Let's start by carving the lollipop. Make straight in stop cuts along the top and bottom edges of the box frame since they are going to remain solid and thus flat.
- Next make angled cuts of 45 degrees on all the vertical side bars of the box frame. This will make the bars triangular in shape. This doesn't affect the look of the project, but allows you to make the lollipop (ball) bigger. The bars will be a little weaker.

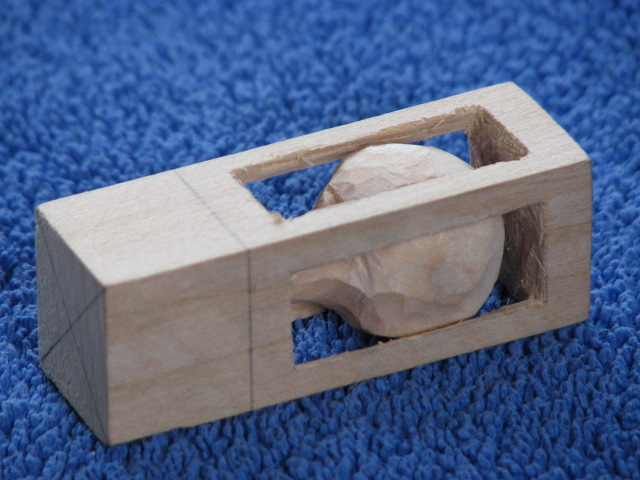
- Start removing wood from the top corners. Move around and do a little work on each corner. Remove as little wood as possible near the middle of each bar where the lollipop/ball is largest.
- Always keep in mind the shape of the lollipop and stick that you are trying to find inside the block of wood.
- Keep removing wood making the lollipop rounder and freeing it from the top and the vertical side bars. Don't put too much pressure on the bars of the box or they may break. Don't let your knife nick the bars or it will put dents in them that will be difficult to get out.
- Now carve the part of the stick that is inside the box. Remove the wood from below the lollipop and inside the box. Be careful not to go too deep with your cuts or you will damage the stick. Check frequently from all sides to make sure that the stick is in the center of the box and more than 1/4" in diameter. Take care to make the bottom of the box as flat and smooth as possible.
- Next carve the stick outside the box. You could cut most of the wood away with a saw if you want to save a little time and effort. Make sure to keep the stick centered. The diagonal marks on the end of the block will help with that.
- Once you have the stick to about 1/4" in diameter, you are ready to free the stick from the box. Begin by making stop cuts around the stick. Make them straight in and as close to the stick as possible. Make them all the way around the stick. The knife blade is laid flat against the stick. It helps to have a thin pointed blade longer than the stick. Circle the stick at least a couple of times making these stop cuts. Then you should be able to run your knife blade completely around the stick without removing it from the wood.
- Now repeat the stop cuts in the opposite direction around the stick as the cuts you just made. Do this all the way around the stick. Remove the slivers of wood as best you can.

- Repeat the prior two steps until the stick is free. You may have to make adjustments to the stick inside the box. Twist or rotate the stick to free it up and remove some of the last remaining chips of wood.
- Make the stick uniform in diameter. Clean up the hole and stick to make them round and remove any fuzzies.
- Now that you can spin the lollipop around, check it for high spots/bumps and smooth them out. Make it as round as you can both in the horizontal and vertical directions. It's never going to be perfect, so just stop when it looks "good enough"!
- Clean up the bars with a little sandpaper on the edges and back to sharpen up the corners. This gives them a clean sharp look.
If the bars get too thin, you can reinforce them by applying a coat of thin super glue (also known as CA glue) to the inside of the vertical bars where it won't show very much. The thin glue will penetrate into the wood making it stronger.
You can leave the lollipop rough with your cut marks showing so that everyone will know it is carved, or you can use sandpaper or riffler files to make it all pretty and smooth. This is quite a task and may take longer than it took to carve.
It's hard to apply a finish to this because the lollipop tends to get stuck to the box, so just be content with no finish. It may get a bit dirty with time and handling.
To make a neckerchief slide, glue a PVC ring to the frame of the box with E-6000™ glue.
You can make this into a golf ball and tee by simply adding dimples to the ball and tapering the stick to more of a point. Make the point where the tee joins with the ball stand out so they look like separate objects. Painting the ball white really sells it!
You can combine this with other elements like captive rings, links of chain, or a slider. See what interesting combinations you can create.
Copyright © 2011 Vincent Hale