[Title]
[text TOC]
[image TOC]
[Site Search]
 [Donation]
 |
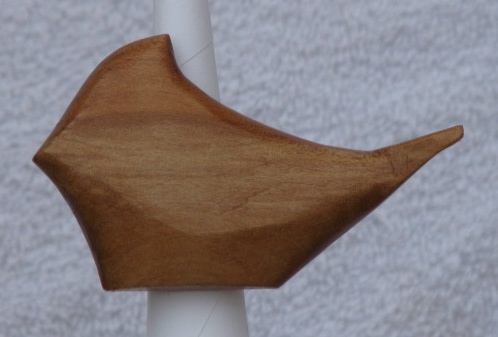
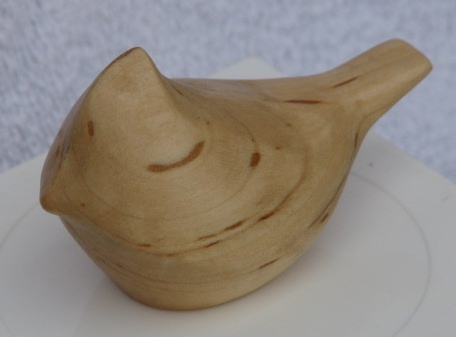
Stylized Cardinal |
 |
| Materials |
Tools |
|
3 1/4" x 2" x 1 1/2" thick wood |
Stick glue
Scissors
Scroll saw
Knife
Pencil
Riffler files
Sandpaper
Finish |
See the Wood Carve section for more instructions, hints and tips.
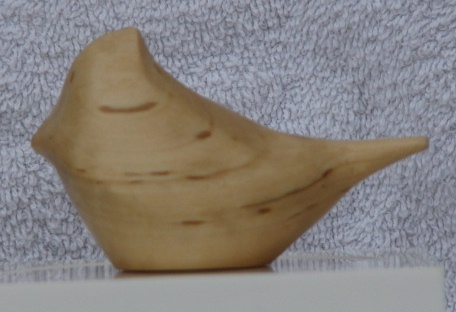
For this project, you can use basswood which has very little grain. Then it can be finished with either a clear finish (see photos below) or acrylic paints. Other good choices are mahogany or butternut (see the photo above) which have strong grains. These look beautiful with a clear finish if the wood is very smooth and free of imperfections.
You can either carve this in the round (both sides, as in the photos below) which is 1.5" thick or just one side (as in the photo above) which can be as narrow as 3/8".
Riffler files don't deteriorate like sandpaper and they come in a variety of shapes to fit almost any curve. I think it is easier to remove lots of wood and get an overall smoother surface with riffler files than with sandpaper.
 |
- Print out the outline, cut it out, and glue it to the wood using the glue stick. The grain of the wood should run from the beak to the tail of the cardinal.
- Cut it out with a scroll saw.
- Draw a line around the middle of the cut-out if you are doing a full width (both sides) carving. This marks the mid-line of the cardinal to assist in placing the beak and tail.
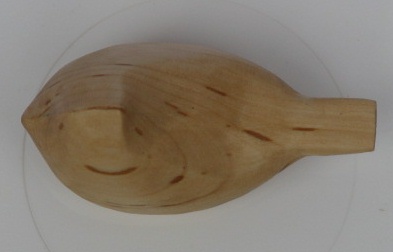
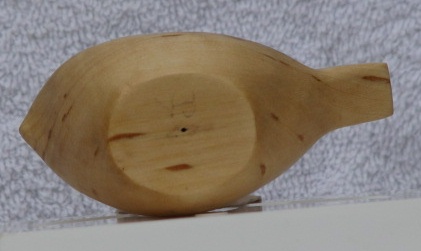
- Draw an oval on the base about 1" wide and the length of the base. If you are doing only one side, make the half oval about half the thickness of the wood.
- The centerline is shown in red in the drawing. It is the widest part of the cardinal. Above the centerline is sloped up and below it is sloped down.
- Redraw the centerline when needed as you carve sections of it away.
- Shape the base to the oval.
- Draw the top view on top of the cut-out.
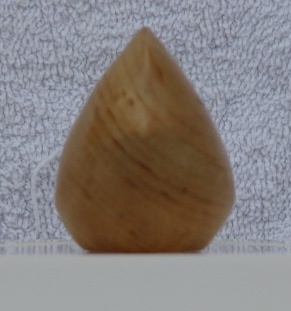
- Shape the sides to the top view. Taper the body to the tail and the head. Work on both sides at once to maintain symmetry.
- Round the top of the back and the breast and throat. Remember that the top and bottom come to a point at the centerline.
- Bring the crest and beak to a point. By now the body should be pretty close to finished.
- Thin the tail. Make sure the top and bottom of the tail flow smoothly into the body.
- Inspect and fine tune the carving to make all the curves flow smoothly.
- When you are satisfied with the general shape, start smoothing it with the riffler files. File to smooth the sides toward the centerline. This is across the grain. Be sure to get the tail to the body, the chin, and the back of the head and crest.
- When it is smooth, no divots or knife marks, then start filing in the direction of the grain.
- Follow this with medium grade sandpaper and then fine (600) sandpaper.
- Check for any flaws or scratches. Use your knife, files, and sandpaper to smooth them out. Any defect will stand out especially with a clear finish. Take your time here and do the best job you can.
- Wipe it clean and finish as desired. You can insert a push pin into the base and use a clothes pin, paper clamp, or wire to hold it while drying.
Use E-6000™ glue to attach a PVC ring to make a neckerchief slide or a ribbon to make an ornament.
Thanks to Jim Duncan for teaching me this project.
Copyright © 2009 Vincent Hale