

[Title]
[text TOC]
[image TOC]
[Site Search]
 [Donation]
 |
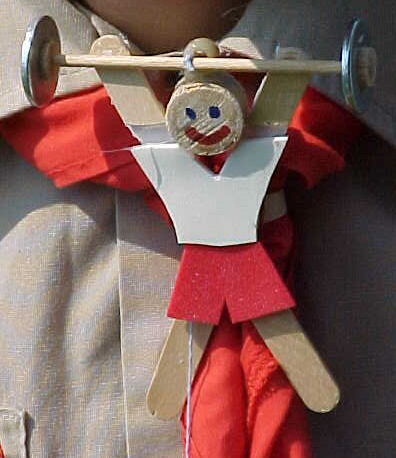
Weight Lifter |

|
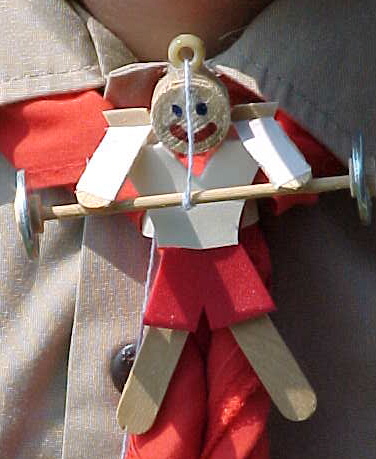
| Materials |
Tools |
2 popsicle craft sticks
1 1/2 inch dowel, 1/8 inch thick
2 Pony beads
2 3/4 inch washers
1 1/16 inch dowel, 3 inches long
2 1/4 inch dowel, 1/8 inch thick
1 string, 18 inches long
1 PVC ring
1 wire 10 inches long
Foam
Markers
2 Cloth hinges 1/4 inch by 1 inch |
E-6000™ Glue
Hot glue |
See the Moving Chapter for more instructions, hints, tips, and ideas.
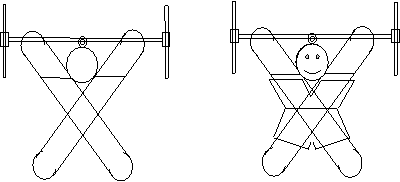
- Cut craft sticks at angle so that when glued together the cut is parallel to the ground. See
illustration below.
- Glue craft sticks together at angle shown using Aleene's Tacky Glue™.
- Glue hinges to craft sticks, front of long stick, and back of short piece using Aleene's Tacky Glue™.
- Drill 1/16 inch hole in 1/4 inch dowels, glue onto ends of 1/16 inch dowel using Aleene's Tacky Glue™.
- Glue washers onto 1/4 inch dowels using hot glue or E-6000™.
- Glue head onto longer craft sticks using E-6000™.
- Glue bead on top of head using E-6000™.
- Cut out shirt and pants (see patterns) and glue to craft sticks using hot glue.
- Glue bar onto arms using Aleene's Tacky Glue™.
- Glue ring to back of craft sticks using E-6000™.
- Attach wire onto ring and twist into a figure eight pattern.
- Tie string to bar, run it through bead, and tie second bead to other end of string. Put a drop of
Aleene's Tacky Glue™ on the knots to lock them tight.
- Draw face.

Hot glue can be used for all of the assembly if speed is important. However,
a much more sturdy weightlifter can be made by using the glues indicated in the
directions.
Copyright © 2001 Vincent Hale