

[Title]
[text TOC]
[image TOC]
[Site Search]
 [Donation]
 |
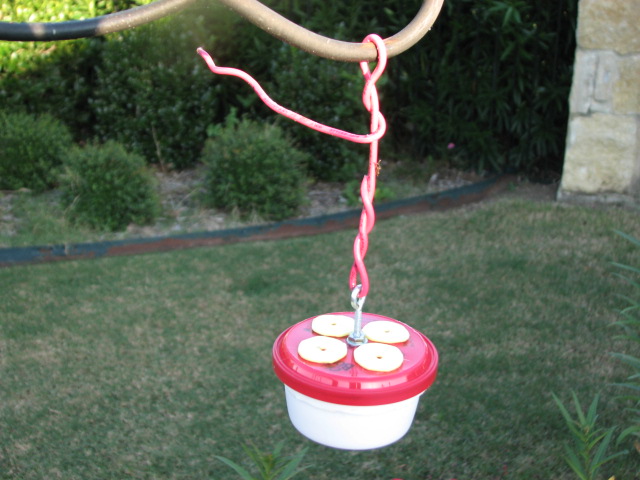
Hummingbird Saucer Feeder |
 |
| Materials |
Tools |
Container
5"x5" Red foam
2"x2" Yellow foam
3/16" Eye bolt 2" long
2 Washers
2 Nuts
12" Wire |
Glue
Sandpaper
1/8" Hole punch
Pen
Scissors |
See the Activities section for more instructions, hints and tips.
Here are some more ideas to help you enjoy hummingbirds.
See the hummingbird information page for more information on feeders and making nectar.
The ideal shape of the container is 3 to 5 inches in diameter, about 1 inch deep, and with a flat or domed lid (not indented as that collects rain water). Check in groceries and drug stores. You can find suitable containers in cake decorations, diary (dips and sour cream), produce, and soup. Be sure to pick one with a tight fitting lid that will stay closed with the weight of the nectar and being bumped around in the wind.
This type of feeder is very easy to clean and won't drip. Drips are bad because they waste nectar and attract bees and wasps. This feeder doesn't hold a lot of nectar because you need to replace it frequently during the summer because it spoils.
You can use either E-6000™ or hot glue for this project.
Fortunately, hummingbirds are not picky about looks! As long as you catch their attention with something red, they will investigate it and find the nectar.
Below are the general instructions using a container you can find at a grocery.
- Prepare the lid. This can be done ahead of time. Make a hole in the very center of the lid so it will hang level. Use a drill or poke a hole with a nail. There is usually a mark in the center of the lid that is left over from the molding process to guide you.
- Roughen up the container lid with sandpaper. Glue the red foam onto the lid. Cut the red foam to fit the lid. Poke a hole in the center of the foam through the center hole in the lid.
- If you want, you can put red foam around the sides of the bowl. Cut it to size and glue it in place. Use rubber bands to hold the foam in place while the glue dries.
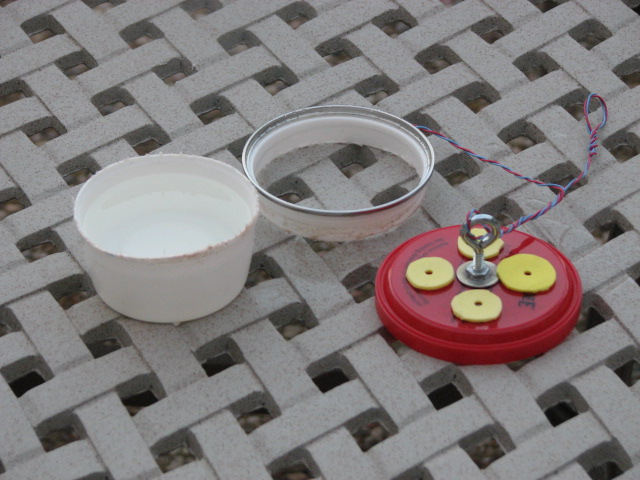
- Put a nut and washer on the eye bolt and insert it into the foam and lid. Put a washer and nut onto the bottom of the eye bolt. Hand tighten the nuts.
- Cut out three or four circles from the yellow foam about 1 inch in diameter (the size of a quarter) for the flowers.
- Glue the flowers evenly spaced around the edge of the red foam. If the lid already has holes, hold it up to the light to assist in centering the flowers on the holes.
- Using a 1/8" hole punch or a hot nail, make holes in the center of the flowers through the lid and red foam. Rotate the lid to help cut all the way through. If you make the hole larger in diameter, wasps will try to get in and if you make it smaller, the hummingbird's beak won't fit.
- Put a wire through the eye bolt and twist the end securely. Twist a loop in the opposite end of the wire. You may need to use a hook (made out of a coat hanger or other stiff wire) or string to hang the feeder from a limb. If you use 18" of 1/8" diameter wire, you can use the extra wire to make a perch which the hummingbirds will appreciate.
The best container I've found is a microwaveable 7.25 oz. soup container from Chef Boyardee™. It is 3.5" in diameter, and 2.5" tall (which is a little tall). It comes with a red plastic lid that even has holes! When the container is shortened, as described below, it holds about four ounces of nectar.
To prepare this soup container:
- Clean it out well and remove the label.
- Finish the lid as instructed above.
- With a very sharp knife (it can also be done with a hack saw), cut the bowl about 1/2" below the lip.
- Use sandpaper to roughen up the inside of the lip and the outside of the bowl.
- Put a bead of hot glue or E-6000 all the way around the top outer edge of the bowl and slide it into the top of the lip section. Make sure the lip and bowl are firmly seated together.
- After the glue has dried, take a sharp knife and trim off any of the bowl that sticks up above the lip of the container, so that the lid will fit securely.
The metal lip tends to rust. You can prevent this by spraying the lip with a coat of acrylic spray paint or just make another feeder when the rust gets too bad.
The plastic lid tends to deteriorate in the sun. Keeping it in the shade helps. You will need to replace it when it fades, gets brittle and starts to crack.
Copyright © 2012 Vincent Hale