
[Title] [text TOC] [image TOC] [Site Search]
 [Donation]
[Donation]
[Donation]
| Hard Candy |
|---|
| Materials | Tools |
|---|---|
|
1 cup sugar 1 cup water 1 cup corn syrup 1/2 cup powdered sugar Ziplock bag 1/4 teaspoon Coloring Flavoring |
1 quart saucepan Wooden spoon Candy thermometer 9" x 9" baking pan Kitchen knife |
See the Activities section for more instructions, hints and tips.
You might also hear this called rock candy because it is so hard or glass candy because it is transparent.
CAUTION - Safety First
Very close adult supervision is necessary as the hot mixture could be extremely dangerous. It's better to let children help at the start by gathering the ingredients and mixing them. Then let them be involved with preparing the molds and cutting the pieces apart. Keep children away from the stove as the mixture is cooking and cooling down.
Coloring
Add a quarter teaspoon of coloring if desired. Red works best, but use other colors as desired. Use the color that comes to mind when you think of the flavor (that is yellow for lemon or red for cinnamon). If you really want to confuse people use a different color. Their eyes will tell them one thing and their tongue another.
Flavoring
It's best to use oil flavors like cinnamon oil or lemon oil. Oils have a better and stronger flavor than extracts. You only need about 1/4 teaspoon of oil. Oils are sometimes available in drug stores, but can be found easily on the Internet. Some other flavors to try include orange, lime, anise, mint, root beer, and vanilla.
If you can't find the oil, you can use extracts which are widely available in groceries in a wide variety of flavors. The flavor won't be as intense or strong. Use 1/2 to 1 teaspoon of extract for flavor.
With the citrus flavors, you can add 1/4 teaspoon of citric acid dissolved in 1/2 teaspoon of water to give the flavor more tartness.
A word of caution about flavoring. Don't make the flavor too intense. Many medicines use an intense flavor to try to mask or hide the bad underlying flavor of the chemicals. It helps to smell the flavor first to see if it brings up any unpleasant memories of medicine. Subtle flavors are often better.
To make sour candies, all you have to do is dust the final candy with a mixture of equal parts powdered sugar and unsweetened powdered drink mix. This works well with the lemon flavored candy and lemonade. When you first put it in your mouth, it gives you a rush of flavor and tartness. But then the flavor settles down and gets sweet as you get to the hard candy.
Molds
You can also use molds for the candy. Silicone works best because the candy doesn't stick to it. Metal molds like for small muffins are good. Plastic molds used with chocolate are widely available in a variety of shapes for every occasion. Be sure the mold is safe for high temperature - some molds are only for low temperature candies. Metal and plastic molds must be coated with oil before using. Immediately after you pop the candy from the mold, drop them into a bag of powdered sugar to coat them so they don't stick together.
Procedure
It takes about an hour and a half to make. Be patient because it takes a lot of time to heat up.
In this recipe we will use a baking pan or pie pan for the mold. You can also use heavy aluminum foil to fashion a pan. The amount in this recipe will make a disk about 8" in diameter and 1/4" thick. As the candy hardens, we will cut it into bite size pieces.
Place the sugar, water, and corn syrup in a one quart saucepan over medium high heat. Stir until the sugar has dissolved, then don't stir any more. Let boil for several minutes. Use a candy thermometer to check the temperature. Don't let the thermometer rest on the bottom of the saucepan or the reading will be higher than the actual temperature of the mixture.
Watch carefully as the temperature climbs to 210 degrees, pauses for a while, then slowly rises to about 270 degrees then quickly reaches 300. If you notice the mixture starting to turn brown that means that it is burning. Don't stir, but turn the saucepan so the hot spot of the stove is under another part of the mixture. Continue boiling until the temperature reaches 300 degrees, the hard crack stage. If you don't heat to at least 300 degrees, the candy will be extremely sticky and could remove dental crowns and fillings.
As the mixture is heating to 300 degrees, prepare the pan for molding the candy. Completely cover the bottom of the pan (or an aluminum foil tray) with a thin layer of powdered sugar. The powdered sugar will first of all keep the candy from sticking to the pan. It prevents the candy from sticking to the knife as you cut out the pieces. It also keeps the candy from sticking to itself once it is cut into pieces. Use the back of a dry spoon to spread and smooth the powdered sugar.
When the mixture reaches 300 degrees, take the saucepan off the stove. Let it cool for a couple minutes. The flavoring doesn't turn out as good if it is added while the mixture is at a high temperature. Putting off adding the flavor until the mixture has cooled to about 270 degrees will increase the flavor. Then add any coloring and/or flavoring. Be careful as you add these, they will cause a cloud of steam to rise. It's best not to breathe these strong aromas. Only stir long enough to get the color and flavor mixed in, just a few seconds. If you over-stir the mixture, the candy will not get hard.
Quickly pour the mixture into the molding pan with the powdered sugar on the bottom. Then cover the top of the mixture with powdered sugar. The candy will harden from the edges toward the middle. As the candy starts to harden use a kitchen or butter knife to make grooves in the candy about every 1/2 inch in a crisscross pattern. You will have to go back over and re-make the grooves as the liquid mixture will flow back into the grooves, especially towards the center.
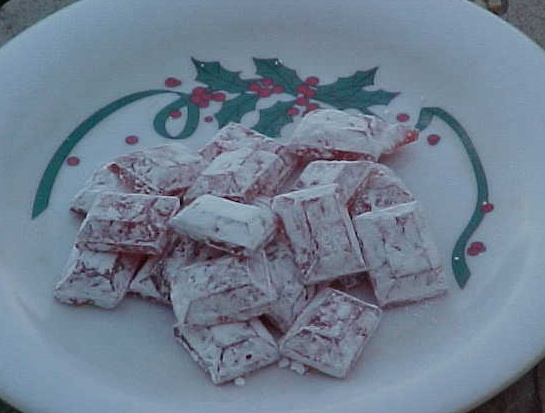
When the candy has hardened, tap the grooves with the knife and the candy will break on the lines. Place in ziplock bags for storage. Add a little extra powdered sugar to the bag and mix it around to cover the side of the pieces.
If you are using individual candy molds, use a large spoon to dip the mixture from the saucepan and place it in the individual molds. Work fast as the mixture will harden quickly. After the candy hardens in about 15 minutes or so, pop the candy out of the molds and place it in a bag of powdered sugar. Coating the outside with the powered sugar helps prevent the pieces from sticking together.
When you get ready to cleanup, don't panic because the candy has turned rock hard on your saucepan and utensils. Simply soak everything in warm water for a while to dissolve the hardened candy.
Why not make this as a special treat on a campout? It is simple enough and only requires a few extra ingredients (sugar, corn syrup, powdered sugar, and flavoring) and a candy thermometer. You'll impress the kids and maybe a few adults, too.
You might also be interested in making a Santa Cookie.