
[Title] [text TOC] [image TOC] [Site Search]
 [Donation]
[Donation]
[Donation]
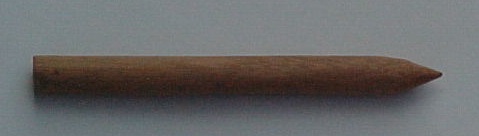
| Pencil |
|---|
| Materials | Tools |
|---|---|
|
1/2" x 1/2" x 4" wood 2 mm lead |
Drill press and 5/64" bit Saw Wood Glue Knife |
See the Wood Carving section for more instructions, hints and tips.
This is a good first or second project for most beginners.
If you are not quite ready for this, then sharpen a store bought pencil.
It is easier to make a bunch of these at a time than just one because of the setup time to drill the holes straight into the block of wood.
For beginning carvers, basswood is best because it is easiest to work. For more experienced carvers, use a prettier wood like butternut or mahogany.
The 2mm lead is sometimes known as drafting lead. It is becoming harder to find because computers are replacing the drafting table. Check office supply, drafting supply, art, and craft stores. You can get it on the Internet also, but it will be more expensive with shipping. 2mm lead comes in 6" pieces although there is something called compass lead that is 1 1/4" long. You only need a couple inches per pencil and can get by with the compass lead. The lead does not need to run the whole length of the pencil. After the pencil gets to be about 3" long it is almost unusable. If you can't get 2mm lead use the largest you can find and drill an appropriately sized hole.
The grain of the wood needs to run the length of the pencil to make carving easier.
You will probably find some parts of the wood that don't carve easily because of the grain. That is, it is hard to make a sliver because the blade just seems to want to keep going deeper into the block. In this case, carve that area from the opposite direction.
If you want a really smooth finish use sandpaper. Start with something like 80 or 120 grit to smooth all the hills and get out all the imperfections. Then use 240 and finally 400 to really make it smooth and bring out the grain. Emery boards are ideal for this.
If you want, apply a coat or two of clear finish to really bring out the grain. Use a wooden spring clothespin to hang it up by the point to dry.
Do NOT use this as a neckerchief slide - it is too dangerous.
For some interesting information, see Wikipedia's history and manufacturing of pencils.