See the Wood Carving section for more instructions, hints and tips.
Layout the perimeter of the acorn on the piece of basswood. The grain runs through the stem and point.
Cut it out using a scroll saw or coping saw.
Draw the line between the cap (top) and nut (bottom).
Make a stop cut at the bottom of the cap.
Take the bottom down about 1/8".
Round the sides of the cap and nut all the way to the back. Leave a point at the bottom of the nut.
Take the stem down about 1/8". Be careful because it will break easily. Make your cuts from the top to the bottom.
Round the stem.
Sand the nut smooth.
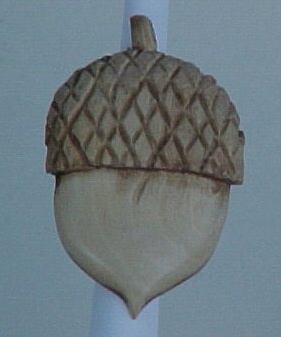
Make V cuts for the cross hatch on the cap. Make them as close or far apart as you want. You can either do this with a V gouge or with a knife. Try to avoid the area right around the stem. Make the V cuts on the flat top first and then work them down around the edges.
Attach a PVC ring to the back with E-6000™ glue.
To complete it, you want the top dark with a dull, flat finish and the bottom light with a glossy finish. You can achieve this by first painting with acrylic and then painting the top with a matte finish and the bottom nut with a glossy clear finish.

 [Donation]