

[Title]
[text TOC]
[image TOC]
[Site Search]
 [Donation]
 |
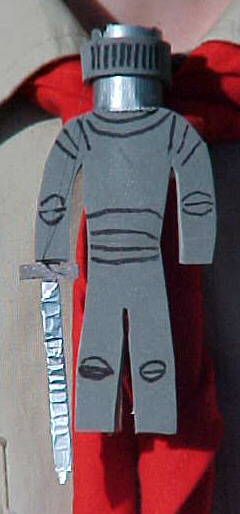
Knight with Sword |
 |
| Materials |
Tools |
Clothespin
Gray Craft Foam
Thread
Aluminum Foil
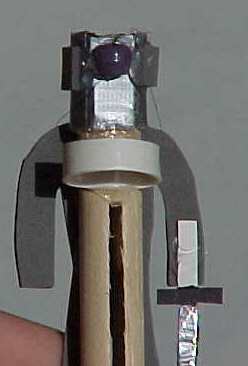
2 Pony beads
PVC Ring
|
Black Permanent Marker
Hot Glue
Duct Tape
Scissors
Knife
|
See the Moving Chapter for more instructions, hints, tips, and ideas.
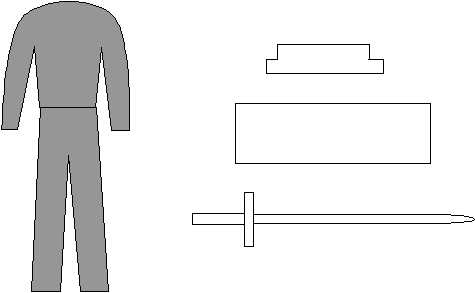
- Cut knight, helmet, mask, and sword from craft foam using patterns below.
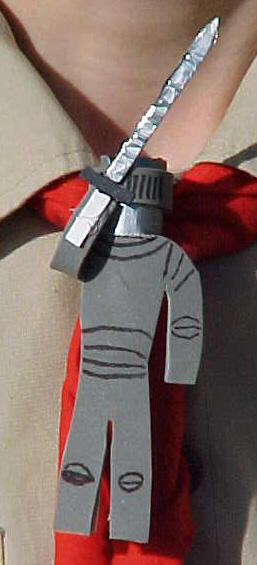
- Wrap helmet around head of clothespin and tape in place with Duct Tape. Hot glue mask to helmet.
- Hot glue knight to clothespin.
- Hot glue PVC ring to back of clothespin (use a smaller PVC ring to hold slide on tight). Hot glue one pony bead to middle of helmet as shown in photo below.
- Decorate knight and mask with marker.
- Wrap sword with aluminum foil.
- Hot glue sword to back of knight's arm.
- Run thread through pony bead and tie to sword's handle.
- Tie second pony bead to other end of thread.
- With a knife, cut a small "V" notch in the helmet to guide the thread. See notch on left of helmet in left photo above.
Back of Knight
Copyright © 2002 Vincent Hale