[Title]
[text TOC]
[image TOC]
[Site Search]
[Donation]
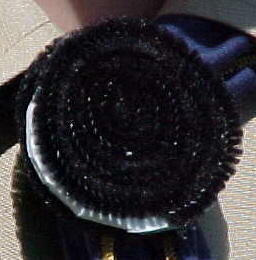
Oreo
Materials
Tools
2 black chenilles
White foam
PVC ring
Hot Glue
Scissors
See the
Chenilles Chapter
for more instructions, hints, tips, and ideas.
Bend each of the two chenilles into a tight spiral, so they look like a disk.
glue spirals to opposite sides of the craft foam using hot glue.
Trim the edges of the foam to fit the chenille disks.
Add a PVC ring.
Copyright © 2001 Vincent Hale

 [Donation]
[Donation]
[Donation]