[Title] [text TOC] [image TOC] [Site Search]
 [Donation]
[Donation]
[Donation]
| Molded Candles |
|---|
| Materials | Tools |
|---|---|
|
Wax Wick |
Mold Mold sealer |
See the Candles Chapter for more instructions, hints, tips, and ideas.
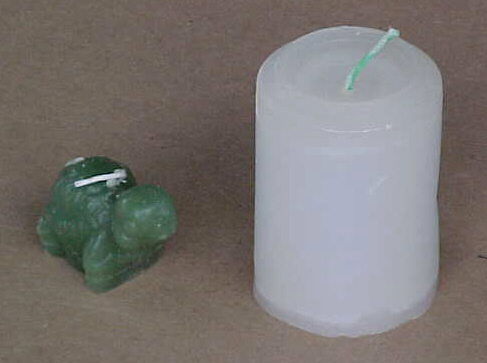
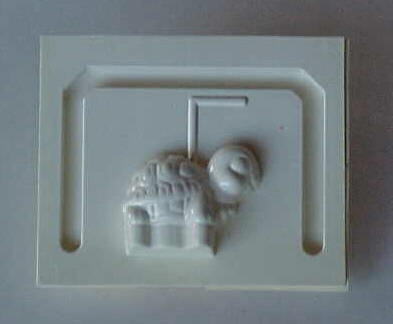
Plastic molds are available at craft stores. They come in several varieties. One-sided molds are like ice cube trays or candy molds. These can be used for floating candles or thin shapes for decorating the sides of larger round or square candles. Two sided molds are used for making 3-D figures.
There are a lot of things that can be found around the house that can be used as molds, also. Some of these include soft drink cans, milk cartons, juice cans, muffin tins, cardboard tubes, cups (paper, plastic, or Styrofoam), and cardboard cones. The mold needs to have straight sides or tapered so that the candle will slide out.
If you use soft drink cans, cut the top off with a hacksaw and cover the sharp edge with tape.
Melt the wax and add color, hardener, ... to it. Remember that wax shrinks as it cools so you want to have some wax left over to top the candle off once or twice after the initial pouring. Make it now so it will have the same color and chemistry. To minimize the shrinkage, let the wax cool as much as possible before pouring it into the mold.
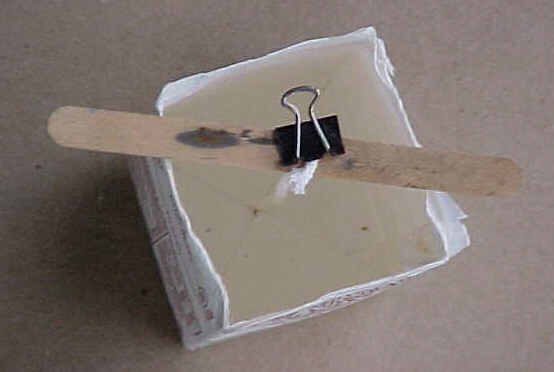
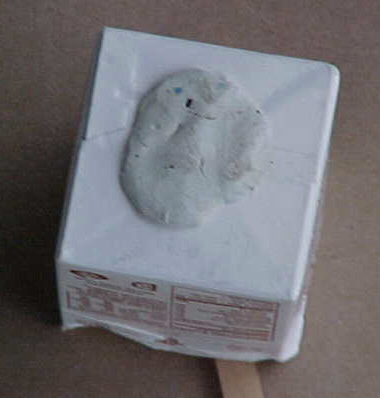
Prepare the mold if necessary. If the mold is a bit flimsy, reinforce it with stiff paper and/or duct tape. Put mold release on the inside of the mold, except for acrylic molds - don't use mold release on these. Store bought molds should have a place for the wick. For improvised molds, punch a small hole in the bottom of the mold using a nail. Tape one end of a primed wick to a craft stick. Push the other end of the wick through the hole. Pull the wick taut. The wick should be straight when the stick rests on top of the mold. Push mold sealer tightly around the wick where it goes through the hole in the bottom of the mold. This will hold the wick in place and prevent wax from draining out the hole. The candle will be poured upside down so the bottom of the mold with the mold sealer will be the top of the candle.
If you can't poke a hole in the mold for the wick (for example the muffin tins), then make the candle without a wick. Once the candle has been removed from the mold, use a hot ice pick or drill to make a hole through the center of the candle. Pour some wax into the hole. Push a primed wick into the hole and let it stand until it has set.
Pour the wax - Place the mold in an aluminum pan (to catch any excess wax) and carefully pour the wax into the mold. Make sure the wick is centered. Tap the mold or use a long wire to remove air bubbles. Let stand until the wax has cooled and hardened.
Top off the candle because wax will shrink and form a dimple as it cools. The larger the candle the bigger the dimple that needs to be filled. Use that extra wax that you made when you first poured the candle to fill in the low spot. It may be necessary to do this a couple times.
Remove the candle from the mold. Remove any tape and mold sealer first. If you can, just cut or tear the mold away being careful not to damage the candle. If you don't want to destroy the mold, turn the mold upside down and gently tap it on a table. If the candle is stubborn, place it in the refrigerator for a couple minutes and try again. See the Candle page for hints on fixing blemishes on the sides of candles.
Trim the wick - On the bottom of the candle, the wick should be trimmed completely off, flat with the bottom of the candle. On the top of the candle, leave 1/2" of wick.
Level the bottom of the candle by trimming it with a knife or place in a warm pan and rotate.