
[Title] [text TOC] [image TOC] [Site Search]
 [Donation]
[Donation]
[Donation]
| Magic Dollar |
|---|
| Materials | Tools |
|---|---|
|
4 pieces of craft foam 1"x2" 10" piece of thin ribbon Small dollar bill PVC "D" ring |
Hot glue |
See the Moving Chapter for more instructions, hints, tips, and ideas.
The small dollar bill can easily be made with a reducing copy machine. There is probably clip-art that is available, too.
Start by cutting the ribbon into four pieces - two pieces 2" long, two pieces 3" long. You can use 1/4" ribbon, or make your own using thin plastic or fabric.
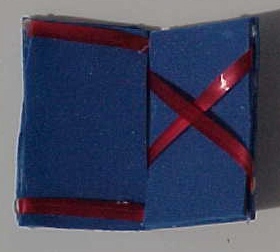
First, glue the ends of the 4 pieces of ribbon to one of the pieces of foam. The 2" pieces of ribbon are parallel - they should be closer together than the size of the dollar bill you will use. The 3" pieces will cross making an "X". Notice that the center of the "X" is slightly offset toward the left.
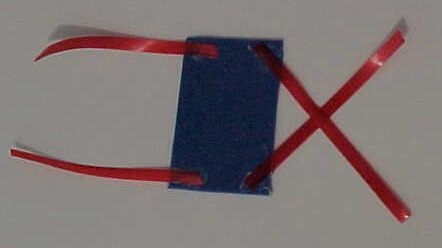
Then glue a second piece of foam on top of the first piece.
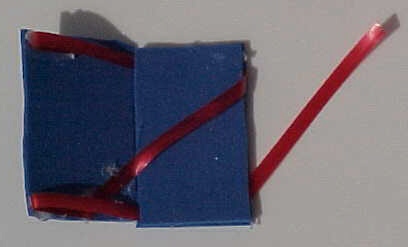
Lay the third piece of foam to the right of the first two. There should be a little bit of room between the two sides. This will allow the side to move easier when the project is complete. Glue the straight pieces of ribbon onto the near side of the foam as shown below.
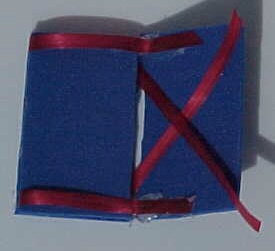
Now move the third piece of foam to the left side of the first two pieces. Now glue the diagonal pieces in place as shown below.
Finally, slide the fourth piece of foam under the ribbons and glue in place. Hold the two sides of the project at a 90 degree angle to give you a little more room to slide the fourth piece of foam under the ribbons.
Glue the dollar bill on the foam underneath the straight ribbons. To finish the trick, glue the PVC ring to the back on the same piece of foam as the dollar bill.
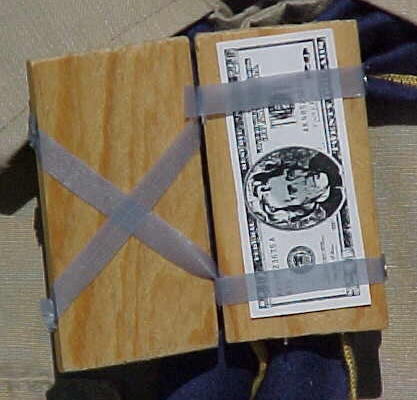
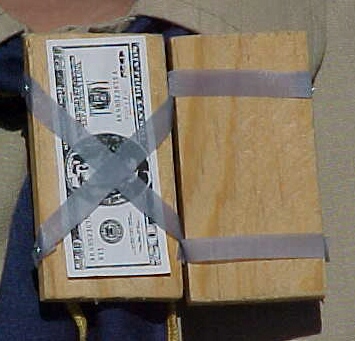
Here's how it works. Open the trick to one side and the dollar bill will be behind the parallel ribbons. Open it the other way and it will be behind the crossing ribbons.
To make the magic work, get the audience to note which ribbons the dollar bill is under the straight or parallel. Close the foam pieces hiding the dollar bill. Now distract the audience by asking them which ribbons the dollar bill is under. Make sure they are confident of their answer. While they are distracted, rotate the trick. Make sure to open it the same direction as you did before. The dollar bill will be behind the opposite ribbons.
You can also use wood to replace the foam. Use nails to attach the ribbon. You may need to reinforce the ribbon with glue to keep it from shredding. You can also use ripstop nylon instead of ribbon. Since the wood will be fairly thin, you will need to pre-drill holes for the nails.
Be careful in the placement of the ribbons. If the crossing ribbons are too close to the top and bottom, they will interfere with the parallel ribbons.